Showing posts with label Recipes. Show all posts

November 18, 2014

A Slice of Decadence

Gino D'Acampo describes his 'La Bella Caprese' recipe as 
"... the best chocolate cake EVER."


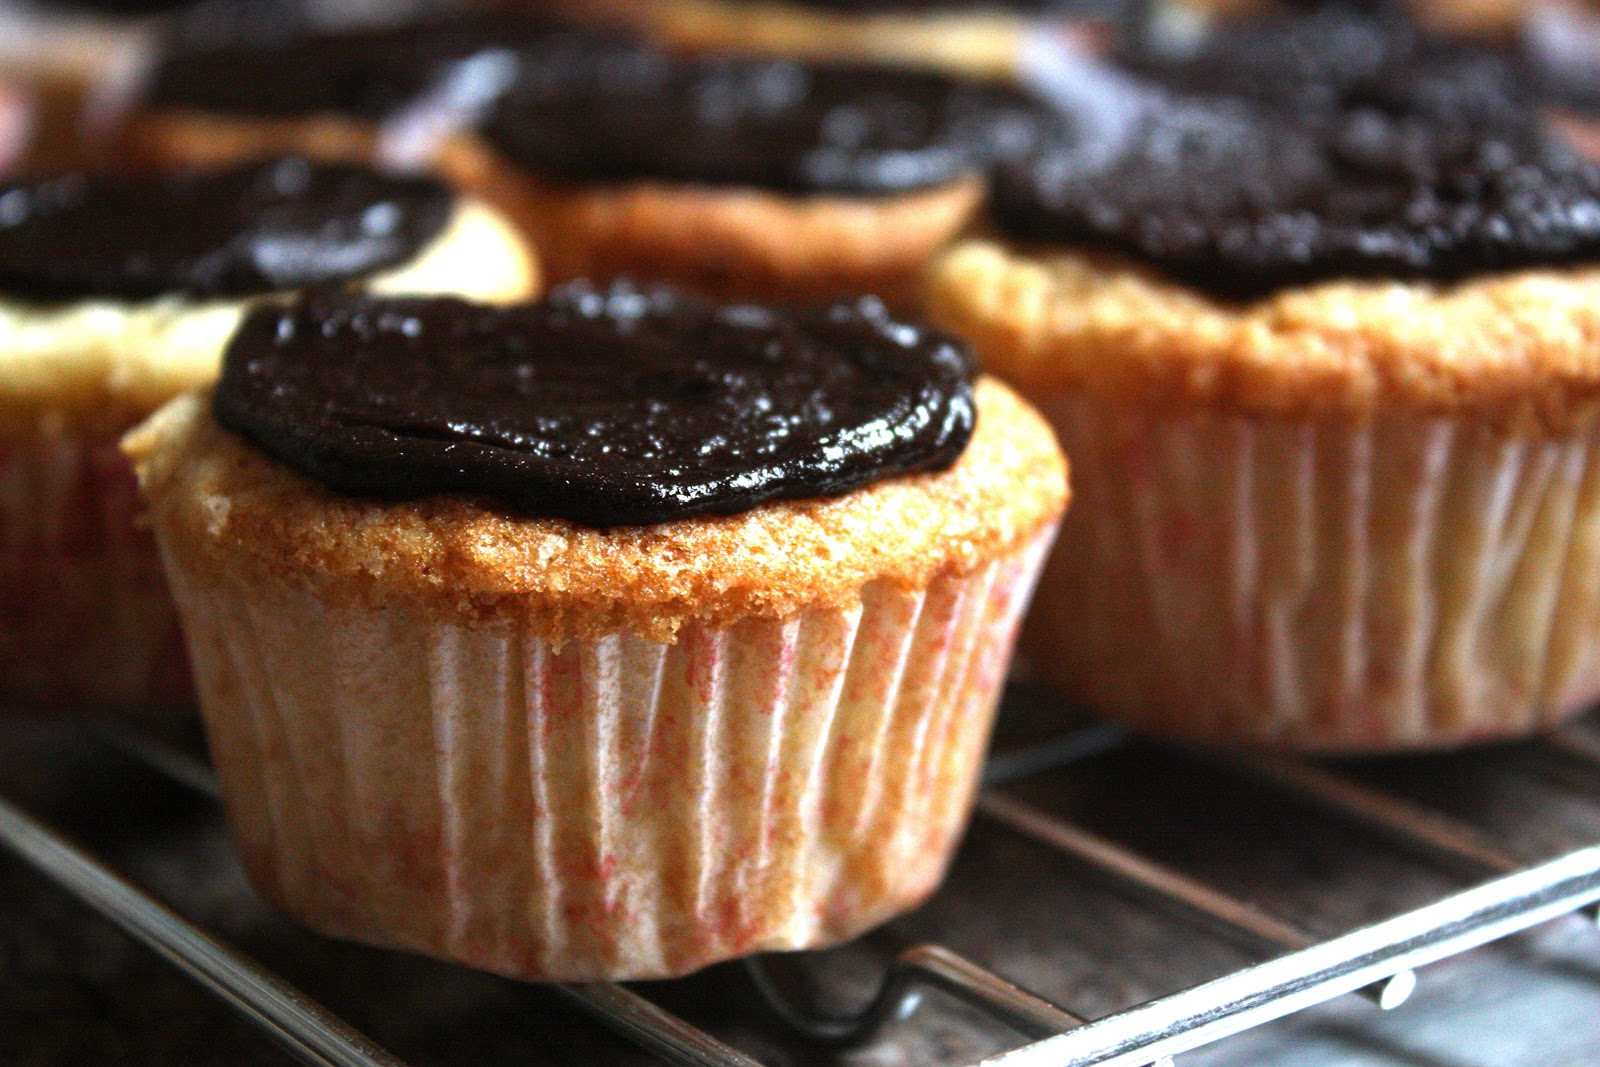
I made this cake a long time ago. The rich ingredients of dark chocolate and almond flour would probably classify it as a occasion cake for when we had guest over, but I made it in the middle of the week for no special reason other than to satisfy a craving for decadence. 

The cake is made up of just 5 ingredients and a very basic method. Melt 250g of dark chocolate (I used Bellarom 70% dark) and 100g of butter in a double boiler.


September 08, 2013

Lime and Chocolate Pie


The lack of an oven and a fancily stocked up kitchen like the one back home in Bangalore is not enough to keep me away from making dessert. I spend a lot of time reading up recipes online; ones that don't require any baking or special ingredients.

This week's recipe research proved successful with some great examples of no-bake lemon pie. As I usually do, I read up a bunch of different versions and then mix and match them when I make it.

For the base, I decided to add a chocolate kick to the pie and used chocolate biscuits to make the cookie base. Powder 100g of chocolate biscuits. (Put the biscuits in a bag and beat the life out of them with a rolling pin) I melted 100g of butter in a pan and then added the biscuit powder to it along with 2 tbsp of sugar (if you are using biscuits that have icing between them, you probably won't need to add as much butter). Once properly combined, put into the pie dish and pat down firmly. Place the dish into the freezer for about twenty minutes. I weighted down the base by placing a heavy glass bowl over it, so that it sets hard.

Melt 100g of baking chocolate along with 1 tbsp of milk and 1tbsp of butter in a double boiler. Pour the melted mixture over the biscuit base and then put the pie dish into the fridge while you make the lemon filling. The melted chocolate will not only add to the flavour and texture but will also seep into the base and keep it from being crumbly when you slice it later.

For the lemon curd filling, squeeze out about 12 limes (the equivalent of 3/4 cup). I wish I had lemons; their flavour is so much nicer. Whisk in 4 tbsp of cornstarch into the lime juice and the zest from 2 limes. Whisk really well so that there are no lumps. Then add 1 full egg and 2 egg yolks to it and continue to whisk. Pour the mixture into a pan and keep the flame as low as possible. Add 150g of butter and keep whisking. It gets lumpy very fast as the eggs begin to cook and the cornstarch starts to thicken the lime juice. 

Right about here, I made quite a crazy mistake. I wanted to add sugar to the mixture and instead of pouring from the sugar bottle, I poured out milk powder. Panic in the kitchen! None of the recipes I read had milk in the lemon curd, because citrus curdles milk. But I was unable to remove all the milk powder and had to mix it in. I guess because it was milk powder and not real milk, it didn't curdle. So, if you have milk powder, add in about 2 tbsp. Then add in about 3/4 cup of sugar (you can alter this depending on how sweet you want it). I used brown sugar, but white is perfectly good too. The finer the sugar the faster it will melt. 

Once the mixture is a smooth, remove from heat. I then transferred it to a bowl to continue whisking. It has to be really really smooth, so whisk away furiously. Don't take too long because it will continue to set. Add a little water if you need to.

Pour the mixture over the pie base and use a knife to level out the top. And back into the fridge it goes. It won't take more than a couple hours, but I left it in there overnight.


When you are ready to eat it, whip 100ml of cream (or more). Spoon it over the pie, grate chocolate over the top and slice it up. 

I've never been too much of a fan of lemon pie. But I think with the chocolate base, it was quite delightful.

Mmmm.


June 11, 2013

Kehel Muwa

This new country has made me quite adventurous when it comes to new cooking.

I've seen plenty of unusual vegetables in India, but have never even wanted to try cooking them. But somehow the vegetable aisle in Sri Lankan supermarkets has tempted me enough to experiment.


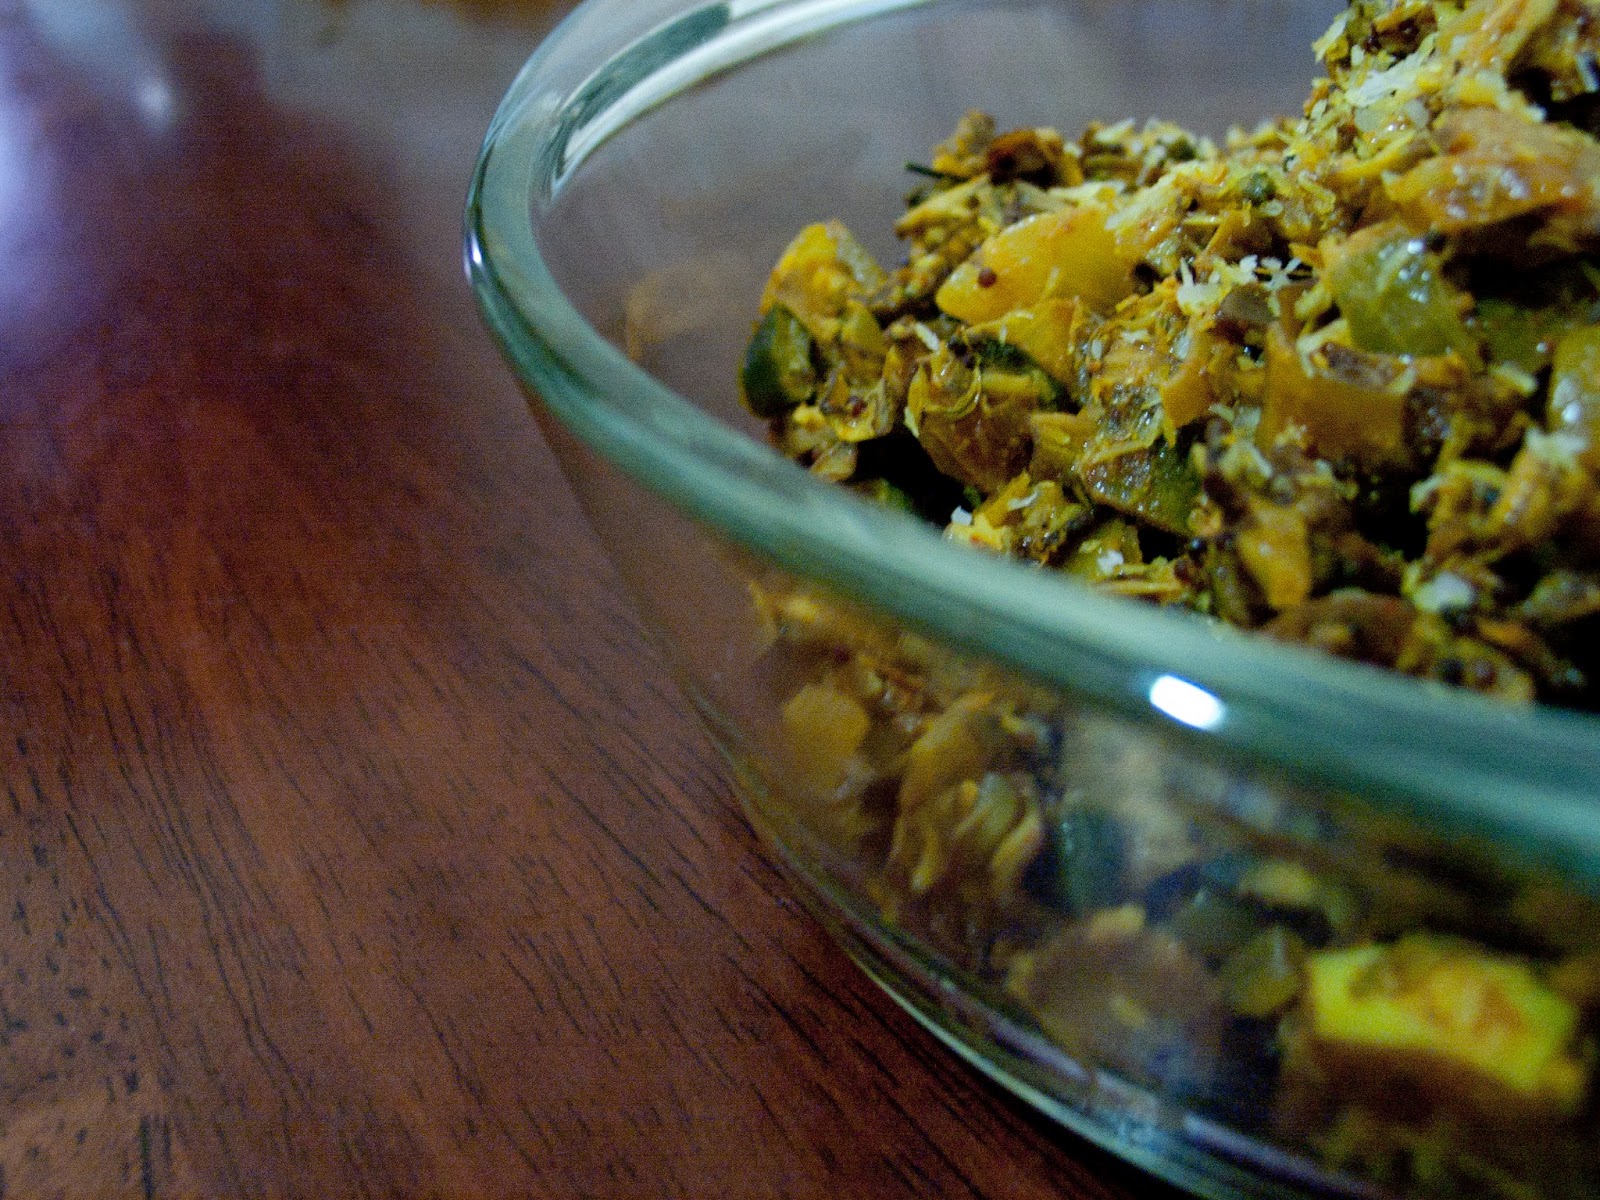
The first week I made dhal with Snake Gourd, the following week made a curry with Thai Eggplant and yesterday stopped at the stores on my way home and picked up some Kehel Muwa- Banana Flower. Definitely the most interesting of the lot. I've never eaten it, let alone cooked with it. But I'd seen a recipe on a friend's blog- Love Food Eat and was convinced that I couldn't possible go wrong if I followed that.


Read the recipe HERE. The recipe was quite straightforward (and her pictures are really good!), but I had to alter it because of lack of ingredients.

My changes:
Had to omit the urad dhal unfortunately. I think it would have really added a lot to flavour and texture if I had it. I substituted dried chili for fresh ones. Quite a difference in taste too. I also added some turmeric and a bit of garam masala. Needed a bit more flavour. Contrary to what she said, this banana flower was not bitter. So, I omitted the jaggery too.


Some more pointers about cooking with it: 
1. Make sure you remove all the tough outer petals. It is not tender at all.
2. The flower loses it's colour really fast and becomes a weird grey, so cut and put into water really fast.
3. It can be a bit sticky and fibrous. So wash well in cold water.
4. I didn't like the little stringy bits, so I boiled it for a bit longer and cooked it more. Probably killed the freshness, but I think it kind of depends on the flower and on preference.

It turned out a lot nicer than I expected. Was tasty and went well with the red rice and potato and coconut gravy for lunch. Leftovers with bread was also tasty.

Next on my list of experiments is Jackfruit. :)

April 17, 2013

Bread Baking at Lavonne

My Mum is probably the best bread baker in Bangalore, and yet all my life I've never learnt from her. We eat homemade bread every breakfast. Many Friday afternoons, she bakes cinnamon rolls, coconut rolls, vegetable stuffed buns and plaits, and pizzas and foccacia. The list goes on. But, after watching and eating all this, I still had my first bread making class from someone else. 

Lavonne Institute of Baking Science invited food bloggers for a special workshop on bread making. It ended up just being Swapna, my Mum and I for the class. Chef Avin, along with some help from his students taught us a variety of things. 

We started off with the soft breads-Rolls, Zoph and Foccacia. The Zoph has an interesting history. In ancient Switzerland, the widowed wives used to cut off their plaited hair to place beside their deceased husband. Later the plaited bread (zoph) was kept instead of cutting off their hair. 


We were given the required ingredients and after mixing together began the tiresome kneading process. No bread machine or Kenwood Chef to do that for us. It seemed like ages and slightly discouraging having the chef inspect every few minutes and saying, 'No, not soft enough!' Great workout for those upper arms. After what seemed like years, the dough reached it's perfect state of elasticity and was ready to shape. We rolled out one batch into 30g balls and then rolled out into 15cm lengths before twisting together to form little knots. The zoph and rolls were finished off with an egg wash and a sprinkling of sesame seeds. Plenty of olive oil was mixed into the foccacia dough and then was generously topped with sun dried tomato paste, fried onions, garlic and herbs and some black olives.


They were all left to rise before being sent away to bake in the oven. Soon the smells of baking bread wafted into the room. And not long after, we got to sample fresh and extremely soft bread (the kneading paid off).


April 14, 2013

Pasta with Peas and Potatoes

Since I've been at home, lunch is my department. The summer heat has been quite annoying. It brings with it lethargy and irritability. Definitely not the weather to be cooking hot rice and dhal (unless of course the kitchen was air conditioned). 

Pasta is usually a dinner thing at home, but today it would be on the lunch menu. 

I'm going to modify this recipe a bit from what I actually made that day. I have this problem of often making less sauce than required for the pasta we need. And this time too, I did just that. So it ended up being a bit on the dry side.


Finely chop up a medium sized onion and a few cloves of garlic and add to hot oil. Fry till onions are translucent. Then add 2 tbsps of rosemary (fresh is best). Potatoes and rosemary make an excellent flavour combination. Also add 1tsp each of dried oregano and sage, 2 tsps of salt and 1/4 tsp of ground pepper. 

Chop up 3 medium potatoes into roughly 1" cubes. I usually leave the skins on for more flavour and added bite, so make sure you scrub them really well so that you don't get any mud into the pasta. Add a tiny bit of water and then cover the pan to let the potatoes cook. Stir every few minutes. (If you have less time than I did, boil the potatoes first) When the potatoes are half done, add 1 cup of frozen peas. 

Once it's all cooked and fried well together, add 200 ml of cream, 200 ml of milk. (creme fraiche would have been ideal) Mix well, till it forms a smooth sauce. If you want it a bit more runny, add some of the brine from a bottle of olives (will give it some extra saltiness too). 

Last of all, mix together with boiled pasta and a very generous grating of Parmesan cheese. 

NOTE: 
1. If the cream you have is really runny, add 300 ml of cream and only 100ml of milk.
2. If there was pesto in the fridge, I would have added some, so if you have, add 1 tbsp. 
3. Add olive oil to the pasta immediately after draining the water out.


February 14, 2013

Valentine Cookies

Hello again, 

Its been a while since I posted a recipe. Since Christmas, I haven't done much baking. Brownie Points is taking a break for a while because I am in the process of finding a job. Yes, I have finally decided that I've had enough of a break. I've already overshot my initial time table to finishing my portfolio. Oh well. It will all get done soon.

I'm not much of a romantic. According to my profile picture on Facebook (courtesy; Alicia Souza), I would happily devour my valentine! But here I am baking heart shaped cookies on Valentines day. I surprise myself sometimes.

One of my friends has a charity sale at work today, so I helped her baked some cookies for her to sell. We baked chocolate and vanilla hearts (and a few stars as well). This is the easiest recipe ever. If you aren't a baker and want to start, this is the recipe to start with.

Chocolate and Vanilla Hearts
(or stars or whatever shape cookie cutters you have)


This recipe is an adaption of one found in 'Cookshelf Baking' by Emma Patmore.

Combine 300g of butter with 250g of sugar, 1 egg and 1 tbsp of vanilla. Beat well with a wooden spoon till nice and smooth. Sift together 450g of plain flour, 1 tsp of baking soda. Add to butter mixture and mix with your hands to form a ball of cookie dough. Roll out to about 5mm thick. Dust flour on the surface, so that it doesn't stick. Cut out as many shapes as you can and then roll the extras out again and cut out more. I got about 40 from my batch. But that kind of depends on the size of your cookie cutters. Place onto a baking tray and bake in a preheated 170 degree oven for about 15 minutes. The cookies should be a little soft when you take them out. They will harden when you cool them.

For the chocolate batch. Put 300g of flour and 150g of cocoa powder. The rest of the measurements should be the same.

Once cooled, dust with icing sugar and eat them. If you're in a good mood, share with people.


Note:
1. If the dough is a bit sticky, add more flour. Even if it's a bit sticky, it's not going to roll easily.
2. Make sure you don't roll it out too thin. If the cookies are too thin, they stick to the baking tray and crack really easily. You will have lots of broken hearts. haha!
3. I powdered my own sugar, hence it's not that fine and doesn't melt fast (which usually happens with the humidity)
4. Store in an airtight container.


November 28, 2012

Truly Scrumptious

The name of the post is after one of the characters from 'Chitty, Chitty, Bang, Bang!' and also perfectly describes this dessert.

I have this problem whipping cream. I mean, I blame the cream I use, but I don't think many other people have the same problem. I've tried everything, but the Amul carton cream just does not whip. It took years for me to actually give up, but now I really have. I settled for non-dairy frozen cream as an alternative. Worked perfectly, but didn't taste as nice.

Then, one fine day tried out another company of fresh cream and it whipped! Unfortunately, the times I actually needed the cream, I could never find it. So now, whenever I do see, I just buy and then think of what to make with it later

Anyway, back to this truly scrumptious dessert. I was generally blog hopping and stumbled across this blog- The Pioneer Woman. Really wonderful site. She lives on a farm with 4 kids and a basset hound and cooks great food and writes well too. This recipe is just soooo easy. Didn't realise mousse could be this simple to make.

I adapted it a bit. This is my version. Click here for her version.

Take 1 & 1/2 C of dark chocolate chips and 1/2 C of caramel chocolate chips. Put in blender. Squeeze out one orange into the blender and whiz away. I don't want to sound like Nigella Lawson, but the sound of those crumbling chocolate chips along with the citrus was quite exciting.


Then add 3 large eggs, a tiny pinch of salt into the blender & whiz some more. Then add 1 cup of very very hot coffee (I used 2 Tbsp of decaf coffee and 1 tsp of sugar- add more sugar if you're one of those people who likes things sickeningly sweet) Slowly pour in with the rest of the mixture. The hot coffee will partially cook the eggs. Blend for another 30 seconds. This gets all the air into the mousse.

Then pour into cups/jars/glasses. The jars she uses are pretty cool. I only had these fluted glasses. I'm sure it would have tasted better in her jars. Oh well. Pour, so that there is enough space for whipped cream on the top. Refrigerate until set. It took about 2 hours. Whip up the cream with a bit of powdered sugar. I also added some orange essence in mine. Dollop into the glasses. Dust some cocoa powder and sprinkle with orange rind and now say 'Hello' to Truly Scrumptious.

Mmmm. 


I shall make this again at Christmas. Somehow the combination of orange, chocolate and coffee seem like a christmassy thing.

November 22, 2012

Asparagus Souffle

I've been spending a LOT of time in the kitchen. Brownie Points has had a very busy last few weeks with Soul Sante, a feature in the Deccan Herald- read here and plenty of Diwali orders. Apart from that, my parents were out of town for a few weeks, so I did plenty of cooking. But, it's not much fun when I have to cook as appose to when I just cook for fun.

Anyway, there was a bunch of asparagus in the fridge and felt like trying something different for dinner. 

This was the first recipe I found on the net when I searched for 'Asparagus Souffle' Brilliant pictures and pretty straightforward recipe.

Read HERE.


Few pointers:
1. Make sure the asparagus is nice and tender. Break off hard stems.
2. The becahmel sauce is supposed to be super thick. Looked liked mashed potatoes to me.
3. Carefully fold in the egg whites. If you over mix, it won't rise well in the oven.
4. If your oven is like mine, you'll need more than 20 minutes in the oven. I didn't even have to turn the heat down. But. don't leave it in there too long. It'll dry out.

Note: In the pictures, it's fallen a bit because I didn't take the pictures as soon as it was out of the oven. Once I started eating, I realised that I should blog about it beacuse it tasted SO yum!


May 02, 2012

Sundays in the Kitchen #4


Sigh.


I am starting this post with a long sigh. A sigh for the many Sunday's out of the kitchen. A sigh for the love and attention that my blog needs.

February 29, 2012

Sundays in the Kitchen #3

I really need to try harder at keeping this up. This post is for Feb 19.


The last Sunday, I planned a huge Spanish meal for the family. I was all prepared only to find out that the parents had other dinner plans. So, this is postponed for another Sunday. And the coming Sunday is a Brownie Points sale at Soul Sante. There'll be lots of baking in the kitchen, but wont be posting anything here. 


Panna Cotta


I ate this heavenly dessert about 10 years ago in the Piazza Navona. One of the few times where I didn't regret not ordering something chocolate. It was so grand that I ordered a second one.


The only other place which came close to matching that one was a restaurant called Giancarlos (where Fireflies is now). Perfect panna cotta and perfect berry coulis too.


I tried making it once before. I made a grand passion fruit coulis, but the gelatin was really rubbish and it didn't set properly, so we had to eat it like pudding. Still tasted good though.


Thanks to my lovely Aunt, I acquired some great gelatin leaves, and quite proud to say that it worked perfectly!


Thank you James Martin for the super rich and super easy recipe with a stunning photograph next to it for motivation.


February 16, 2012

Sundays in the Kitchen #2

"Neither a lofty degree of intelligence nor imagination nor both together go to the making of genius. Love, love, love, that is the soul of genius." - Wolfgang Amadeus Mozart


Happy Valentines Day. Here's a nice soppy song I was listening to today.


So, back to the kitchen. I actually did bake this on Sunday, it just took a while to post it. 


Another birthday calls for another cake. This is a recipe that I've loved making not because of the taste but more because of how it looks. Even if the top is uneven or if it cracks or looks ugly, you just flip the cake and it's beautiful. Very deceptive, since it is actually a really simple recipe.

February 05, 2012

Sundays in the Kitchen #1

Sunday lunch at home is my department. But usually I end up making my ten minute rice and dhal and vegetable fry. Nothing too exciting. I overcame my urge to be lazy this Sunday and decided to cook something different for lunch.


The menu:
Cashew nut and Mushroom Rice, Brinjal (Rat) Curry, Tomato Raita


Brinjal (Rat) curry:
For as long as I can remember, this curry with the whole mini brinjals has been called 'rat curry' at home. Despite the resemblance, it's still quite a gross name.


First wash and trim the tails of the brinjals. Cut into quarters but not all the way up the stem to keep them intact. Make a masala paste with dry mango powder, haldi, garam masala, salt and oil. Use a knife to spread the paste into the slits of the brinjal. Deep fry till the skin is slightly crispy and and the insides are cooked.


In a saucepan, add 1 tsp of grated ginger, 1 tsp of grated garlic to 4 tbsps of hot vegetable oil (if you have groundnut oil, it adds a nice nuttiness to the curry). Add 2 onions that are finely chopped. Mix well and cook till the onions have turned translucent. Add 4 tsps of andhra masala- this is a combination of chili powder, corriander powder, jeera powder, haldi, powdered cloves and probably other things too.  The one we have at home was given to us, so I can't even check any list of ingredients. But I'm sure you can experiment with the use of various powders. Just make sure none of them overpower the dish.


Once the masalas are nicely mixed up, add 5 finely chopped tomatoes. Reduce the flame, cover with a lid and leave to cook for about ten or fifteen minutes. Keep stirring to make sure the bottom doesn't burn. Once nicely cooked, add about 150 ml of coconut milk. If you don't have fresh coconut milk/cream, just mix about 4 tbsps of dried coconut powder with milk. Stir well and put over the fried brinjals. I didn't have any fresh corriander today, but it will make a nice garnish.


Cashew and Mushroom Rice:
In a saucepan, add half a chopped onion, 1 tsp of jeera seeds to 2 tbsp of oil and 1 tbsp of ghee. Then add 1 tsp of grated garlic, 1 tsp of salt, 1/2 tsp of pepper and a pinch of cinnamon. Once it is fried well, add a handful of cashew nuts and 1 cup of sliced mushrooms. Fry till mushrooms are cooked and cashew nuts and golden. Add 2 cups of rice and 4 cups of water. Bring to the boil, then lower heat, put the lid on and cook for ten minutes.


Tomato Raita:
Whisk up about 400g of set curd. Add 3 tsps of black salt, 1 tsp of corriander powder and a pinch of chili powder. Then add 3 finely chopped up tomatoes and half a green chili.


And that was my lunch today. Was quite nice. :)


I really need more practice with food presentation and photography. The thing is I'm far too impatient because the food becomes cold. There's always next Sunday for more practice.

November 08, 2011

Sunday Lunch

I love being alone at home. When the house is empty, I have the sudden desire to do things. I think it's the excitement that takes away the usual laziness (not that I don't love having the rest of the family at home.) Sometimes I resort to frenzied house tidying or singing along to insanely loud music and sometimes I cook.


Red + Green + White = Perfect meal
If the meal has all three colours, it generally means that you've included something from each food group, i.e. carbohydrate, protein, fat, vitamins and minerals.


This is a relatively easy meal.


For the pasta- Make simple tomato sauce while the pasta is boiling- same recipe as used here


For the broccoli cheese- steam broccoli like I did in this recipe. For the cheese sauce- Put 2 tablespoons of butter (50g) in a hot pan and add 2 tablespoons of flour. Stir well and add 200ml of milk. Keep stirring till it thickens. Add 2 tsps of garlic salt. 
Then pour sauce over broccoli and grate cheese over the top (I used Red Leicester). Put in the oven for about ten minutes.


While that is baking, make the bruschetta. This is not the usual raw one that I do. I cooked it. Chop up 2 tomatoes into small pieces. Add to hot pan with a tablespoon of olive oil. Let the tomatoes cook well till soft. Add pinch of salt and pinch of lemon pepper. Lastly, add a tbsp of pesto- recipe here


NOTE: If you don't have any bought pesto and don't feel like making it from scratch, you could even add chopped up basil leaves. 


Add the tomatoes to lightly toasted bread and then chop up some mozzarella for the top.


By this time, the cheese on the broccoli will be nicely melted. Take out from the oven and rest for about 5 minutes while the sauce thickens again.


Potato Patty- This is the easiest part of the meal. Take out 1 McCain patty from freezer. Defrost and lightly brown on a pan with a smear of oil. 


Voila. And the meal is done. This was enough for 2, so my brother got to eat some for dinner. 


Ate in front of the TV while I watched 'Gone with the Wind' (Well, just a part of it. That movie is 4 hours!) 
Perfect Sunday afternoon. :)

November 02, 2011

Pesto Broccoli

I made this as an entre for my ravioli meal


Pesto is really easy to make. All you need are the right ingredients to blend up. We usually have a bottle of homemade pesto in the fridge. We used to follow the recipe from the book, 'Best-Ever Pasta' (Linda Fraser), but now I think my Mum just improvises.


The recipe + modifications:
3/4 cup of fresh basil leaves (not hard to find, but make sure it's not Thai basil- that has a lemon-ey flavour), 4 cloves of peeled garlic, 4 tbsps pine nuts- these are not easily available, but we use cashew-nuts. Tastes pretty good, so add about a handful and a half, 5 tbsps of olive oil, salt and pepper, 1/2 cup of grated Parmesan (the only cheese that can be a substitute is Pecorino.) 
Blend all this up till the consistency that you're happy with. I prefer slightly gritty.


Parboil/steam chopped broccoli. What I did was put the broccoli into a bowl of water and microwave for about 5 minutes. In a pan with about 2 tbsp of oil, add onions (1/2 finely chopped) and garlic (2 cloves, grated) (essentials in everything I cook!). Then add about 4 or 5 tbsps of pesto and the broccoli. Cook till broccoli is tender. I like a bite on the veggies. Shouldn't be too soft. 


November 01, 2011

Tortellini Funghi Pomodoro

And my love for pasta grows further. My Mum suggested I go to Northern Italy and work in a tiny ristorante, oh and maybe work with an architect as well.

When I am bored and more bored than lazy, I usually end up cooking. This time, greatly influenced by the delicate intricate cooking I've been watching on Masterchef, I decided to take pasta-making one step further and try ravioli and tortellini.


Funghi- mushrooms. It's funny how most people associate fungus with something disgusting. I made the filling for the pasta with fungus. 

Take about 2 cups of finely chopped mushrooms. Add them to a pan of hot olive oil and 4 cloves of grated garlic. Stir together. Add 1 tsp of salt, 1tsp of dried sage, 1/4 tsp of pepper and 1 tsp of cinnamon. Once all the water has come out of the mushrooms and evaporated. Add about 50ml of thick cream. This will combine all the ingredients together to form a nice creamy, slightly sticky filling.

To make the pasta- pretty simple. 2 cups of flour + 3 eggs and a pinch of salt. This time, instead of mixing it out on the counter like I did for the Mushroom Lasagne, I did it in a bowl. Far less mess. If the dough is sticky, dust more flour on the surface while kneading. If you don't have a pasta maker, it will take time rolling it out into thin sheets. I don't think I would have taken the effort to do that. Wrap in clingfilm and rest the dough for a while before rolling. Roll them out into quite thin sheets, because when you make the ravioli/tortellini it becomes a double layer.


Note: Keep dusting it lightly with flour. If it's not dry enough, it would roll out easily. Also, keep the dough in the clingfilm so it doesn't dry out.


September 20, 2011

Poached Eggs

Was going to call this post 'Eggs Benedict' but read that it includes an English muffin, fried bacon and Hollandaise sauce. Mine was with brown bread and mayonnaise. 


Ever since season 2 of Masterchef, Australia where they had the poached eggs challenge, I've wanted to try it out. They are also mentioned in the movies, Julie and Julia and Runaway Bride.


The traditional way of poaching the egg is to mix about a tablespoon of vinegar with the water before adding the egg. This is supposed to help keep the albumen and the yoke together instead of spreading all over the water. Then you're supposed to use a spoon to gently fold it together. This is how Gordon Ramsay makes it- click to watch.

September 18, 2011

Burgers and Fry-ups

Friday night + Mum in bed with fever + slight laziness to cook anything fancy = Burgers* and Fry-up.

*burgers were bought not homemade. 

Anyway, so here goes-

September 07, 2011

Avarakkai Poduthuval

I spent a lot of time finding the correct terms for what I was cooking. Thanks to Google and a lot of South Indian food blogs, I finally got this:


Long beans- Avarakkai, Payaru
Fried with coconut- Poduthuval/Thoran (Malayalam), Poriyal (Tamil)


So, this is basically a simply fry of green beans and coconut. Usually eaten with rice and dhal/sambhar.


In about 4 table spoons of vegetable oil, add 2 tsps of mustard seeds. Once they start sputtering, add 6 curry leaves and then add 1tsp grated garlic and 1tsp grated ginger. Stir well and add 1 finely chopped medium sized onion. Next add the masalas- 1 tsp of haldi, 1 tsp of chili powder and 1 1/2 tsp of salt.


Once this is fried well, add about 200g of chopped up green beans. Cover the pan and stir every 2 minutes or so (keep the fire low to avoid burning). After roughly 10 minutes, when the beans are almost fully cooked, add 1 cup of grated coconut. Keep the lid off and stir continuously till fully dry and cooked. And it's done!


Note: I didn't add green chili because my brother has an aversion to food with chili/pepper: But that's only if he sees it. I could have actually added it, it would have camouflaged well.
Most recipes have urad dhal in the fry. Add about 2 tsps to the oil along with the mustard seeds.


07.09.11 (little later on in the day) 
Note: After all that research, I am quite upset to learn, from a reader who put it really politely that I got the terms wrong. :( Avarakkai is a tamil name given to broad beans which is kind of flat and finger sized and not the beans I've used here. Utter fail! Let me know if you know the right word for the beans I've used. 

September 01, 2011

Egg-less Chocolate Cake


One more cake post! There may be a break from cakes after this one. No more birthdays for a while and I don't think any other reasons for cake-baking will come up soon.


This one's for all the vegans/lacto-vegetarians and all those who still love chocolate cake regardless of whether or not it has egg.


I have friends who miss out on my baking because of the above reason, and this recipe cures all that. It's the easiest recipe on the planet, and I'm not just saying that only for those who like baking.


It's taken from the cookbook, 'An Apple a Day'


First sift 1 1/3 cups of flour, 1/4 cup cocoa, 1 tsp of baking soda and pinch of salt (enhances chocolate flavour) In a bowl, beat together 1 cup of sugar, 1/2 cup of oil, 1 tsp of vanilla and 1 tbsp of lemon juice. Add dry ingredients to wet. Mix in 1 cup of cold water and mix till its nice and smooth.


Bake in a buttered and floured tin for half an hour to forty minutes in a 180 degree oven. I suggest frosting it. There's never too much chocolate.


Note: I was told that the cake lacked sweetness. So, either add more sugar, or use Demerara sugar instead, or put a really really thick layer of icing. :)


August 21, 2011

The 'Leftovers' Fried Rice

"Frying gives cooks numerous ways of concealing what appeared the day before and in a pinch facilitates sudden demands" ~ Jean-Anthelme Brillat-Savarin 


A weird recipe to share, but it's quite popular in my house. Ever since my Mum joined her book club, she is away one Wednesday a month and my Dad usually makes this for dinner. The key ingredients are leftover plain rice, leftover dhal and leftover vegetable fry. Those things are never that great to eat by themselves, but in this rice, it's quite grand. :) 


First fry together 1/2 chopped onion, 1 tsp grated ginger, 1 tsp grated garlic, 1/2 tsp jeera, 1/2 tsp haldi, 1/2 tsp corriander powder, 1 tsp of salt in about 3 tbsp of oil. Then break in 2 eggs and scramble them. Once the eggs are cooked add 1 chopped tomato. Then put in about 6 table spoons of the dhal. If you put more, it'll be very mushy rice- not necessarily a bad thing. Then put in the vegetable fry. This time, I found a bit of fried brinjal and used that, but anything will do. Lastly, once nicely fried together, add the rice. We had enough for about 3 people.


Note: I also added about 1/2 cup of frozen corn. Feel free to add other things as well- whatever you can find in your fridge/freezer. Great thing to cook when you're lazy and there are plenty of leftovers to use up.